Monday, January 31, 2011

Channeling Betty Draper

I know I've already expressed my dislike for everyone (especially eBay sellers) referring to any 1960's dress as "So Mad Men".  But I'm going to be a hypocrite and do it right now.  There's no denying that Betty has worn some amazing dresses on the show, but for whatever reason, this icy floral number from Season 4 really stuck with me.

Photobucket
                                  Photo credit Here

Inspired, I decided to check eBay and Etsy for vintage blue floral fabric.  I found three yards of this rayon for $21 and bought it immediately.

Photobucket

It's been sitting in my sewing room for about a month now, while I've been working on other projects.  I had some free time tonight (okay, I was supposed to be cleaning, but whatever) so I started on it.  I used this pattern that I bought on eBay as part of a lot of seven for $5.  The bodice front is a little bit different, but the boatneck and the short kimono sleeves on View 2 are perfect.  Besides, I don't want to make an exact copy.

Photobucket

I had just enough fabric. There was a little stain near the bottom and I was worried it would get in the way, but I was able to cut around it.

Photobucket

The bodice was unlike anything I had seen before.  It was shaped like an upside down T, and the extensions are actually a belt that fastens in the back.  For shaping, there's princess seams on the front and darts on the back.  I got my front put together with relative ease; there was a lot of extra fabric I had to work in but it came together.

Photobucket

The next step is not to sew the bodice together at the shoulders and sides like most patterns.  In this one, you sew the bodice front to the skirt front first.  Then you do the darts in the bodice back.

Photobucket

Then you do the skirt back darts and back slit, and sew the bodice back to the skirt back.  Sewing the sides is actually the last step.  The instructions have you hem the sleeves and put in the zipper first!  I'm going to put in the zipper last like always, because that tends to be where I make any size adjustments.

It's hard to tell if it's even going to fit or look good at this point.  It's looking a little like a hairdresser's smock at the moment, but I'm confident it's all going to come together.

PhotobucketPhotobucket

Hopefully I will have some time to work on it this week.  Orchestra starts again on Wednesday, and that's seriously going to cut into my sewing time! 

Sunday, January 30, 2011

A Refresher Course

My friend Ellie is making the same New Look halter dress I made here and here, and just in case she has any questions along the way, I decided to give myself a refresher and make another version.

PhotobucketThe Details:

  • Pattern:  New Look 6457 on Simplicity.com, $4 and Butterick B5209, $5 on eBay
  • Fabric:  Vintage seersucker, $15 on eBay
  • Notions:  Vintage metal zipper, $.5, Vintage lace seam tape, $.05, two buttons from my collection
  • Total Cost:  $15.55 (not including the two patterns, which I have both used multiple times)

  • Year:  a mix between 2010 and 1947
  • Time to complete: 3 hours


Since I already made two with a slimmer, straight skirt, I wanted to make this one a little different and use the New Look top and the skirt from a retro Butterick pattern.

Photobucket

One other change I made was to the bodice back.  The pattern has two nearly identical rectangles you piece together.  It seems kind of pointless, and also, looks kind of messy if you are using fabric with an obvious pattern repeat.  So I put the two pieces together like this and just cut them as one.

Photobucket

The only other adjustment I had to make was to lengthen the back bodice band by about an inch. 

I finished my waistband and hem with this vintage Wright's folded lace.  Do they still make this stuff?  I have never seen it in stores but it worked so nicely.  I'll have to keep my eye out for more on eBay.  It's really pretty and it was nice and soft, not stiff like the seam tape you buy at Joann's.

Photobucket

I had four zippers that would have worked.  I ended up using the baby blue, since I had three of them, and I sewed it on by hand.

Photobucket

So now I have another cute vacation dress, and I'm ready if Ellie has any questions!

Thursday, January 27, 2011

A gigantic, puffy ball of cotton candy

That is what I look like right now.  I'm going to just go ahead and post this, and get the laughing out of the way:

Photobucket


For the record, I do like the top.  I just think it needs a little um, less skirt. 

Look how cute it is on the pattern envelope!

Photobucket


I'm wearing it backwards because the front looks so, so bad. I couldn't bring myself to show it.  I knew I was in trouble when I laid out the pattern pieces and they looked like this:

Photobucket

You cut two of the front piece, and one of the back. Remember, that is THREE yards of fabric there, allegedly to fit a waist less than one yard.

Holy gathers.
Photobucket

Should I hem this giant blob of Pepto and try to make it work?  Or is it not worth saving?

Wednesday, January 26, 2011

Simplicity 8181

I am totally in beach sewing mode. Every day, I sit at my desk at work wishing I was home sewing pretty skirts and dresses for Mexico!

Photobucket

I've had this pattern for a few months but haven't made it yet.  I bought it on eBay after thinking it would be nice to have some easy, simple dresses to just throw on, but it kind of got put off to the side after my first "simple" dress disaster. 

On Sunday night, I started on my first version in white lace.

Here's the details:
Photobucket
  • Pattern:  Simplicity 8181, $2.50 on eBay
  • Fabric: Thrifted tablecloth, $2
  • Lining: Tablecloth I found in our basement, $0
  • Notions:  Vintage metal zipper, $.50
  • Total Cost:  $5

  • Year:  1969
  • Time to Complete: 2 hours


This dress was really fun and easy to make.  I've had this thrifted lace tablecloth laying around forever; I think I bought it at Value Village in 2003 with the intention of knocking off a Banana Republic skirt.  But back then, I was irresponsible with money and ended up just charging the skirt (I wore it to death, at least) and the fabric laid unused.  It's really sheer, so I definitely needed to line it.  I found this tablecloth in a box in the basement and it was my husband's.  I asked him if I could cut it up and promised to buy him a better one, and he sort of looked confused but said fine.

For a mini-dress, this pattern piece sure is long!  I wanted it to be short and leggy, so I took about 4 inches off the bottom.

Photobucket

Instead of making the lining separate from the dress, I underlined it.  I like that better for sheer fabrics, because then you can't see the seams.

Here's my back pieces, underlined.  There's no shaping on the back; actually the only shaping is two darts on the front.

Photobucket

A closeup of my dart:

Photobucket

And my neckline facing:

Photobucket

There was a neckline facing and two armhole facings, and they were easy, but a pain.  You had to interface them, fold the long edge under and topstitch, sew it to the neckline/armholes, clip the curves and pin the facing back away from the bodice, understitch, and then hand tack the long edge to the lining.  Whew!

For my second version, I wanted to make one more like the picture on the envelope.  I'm always drawn to that color green, but I don't actually own anything that color! 

The deets:

Photobucket
  •  Pattern:  Simplicity 8181, $2.50
  •  Fabric: White linen/rayon blend from Joann's, $11.78
  •  Lining: White Symphony Broadcloth, $7.98
  •  Dye: Rit Kelly Green, $3
  •  Notions: Black Metal Zipper, taken off another dress
  •  Total Cost:  $25.26


This one was fun because I got to dye the fabric myself.  Joann's is good for supplies, but I'm always disappointed by their lack of good apparel fabrics.  They really are great for quilting, I'll give them that.  I've bought some of their cotton quilting fabric for sundresses.  I probably could have ordered something online, but you've probably figured out that I'm impatient and when I want to make something, I want to make it NOW.

I made a slight adjustment to this dress in that instead of taking 4 inches off the hem, I took it out of the waist.  There was a "shorten or lengthen here" line right below the front dart.  I like how this one turned out much better - the skirt is fuller at the bottom and fits better across my booty.  The white one is a little tight.  I also added a lining instead of doing the neck and armhole facings.  Even with double the dyeing and cutting and hemming, I think it was faster, and it looks a lot better.  Plus, I love to hem things.  I think it's my favorite part of sewing.  It's relaxing, and it also means it's done and I get to wear it!

I think I'm going to take a break from sewing tonight and make tacos and watch American Idol (it's in Milwaukee tonight) but I have two patterns I'm dying to get started on.  One is a wrap skirt that uses a whopping 3 yards of fabric (that is a lot for a skirt, I could make an entire dress with 2), and the other is a cropped halter/skirt combo.  'Til tomorrow!

Saturday, January 22, 2011

Vacation, All I Ever Wanted

In my last post, I mentioned that I had exciting news and bought patterns to make clothes for it.  A couple people asked if I was pregnant and making maternity clothes!  It's nothing that big, I swear.  I promise I would never announce that via a blog post  But, Mike and I just booked a trip to Playa Del Carmen, Mexico!  We're going for a week and we're staying at a boutique hotel downtown.  I've been to Mexico six or seven times before, but this will be the first time staying in Playa.  I'm extra excited for $1 beers from the Oxxo and churro vendors on the street.

It's not for almost two months, but I'm already mentally packing.  I thought about doing a completely homemade trip, and only pack things I've sewn myself.  I did an all-vintage honeymoon to New York and an all-vintage Jamaica trip last year.  I think I like dressing in themes - I went through a phase last year where every outfit had to include something from five different decades.  It's not as difficult as it sounds.  I have two pairs of 70's leather sandals I basically wear every day in the summer, and I have a ton of slips from the 60's that I bought on eBay.  I wear my a Gap denim jacket I bought in 1999 every day, and my purse is a new Marc Jacobs.  All I need to add is a 40's or 50's dress and voila, five decades.

So I nixed the idea of an all-homemade vacation because I have too many vintage dresses that I want to bring.  I'm definitely going to bring some homemade dresses though, and I bought two patterns on eBay that I hope to make for the trip.

The first one is Simplicity 6018, which I got for $12.

Photobucket

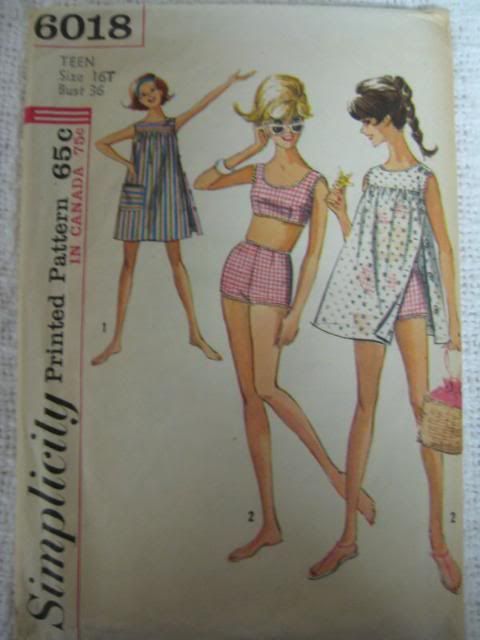
I love the swimsuit!

Photobucket

I want to make it in this fabric and wear it to lounge by the pool. I hope it doesn't traumatize my husband too much. He's usually pretty down with whatever I wear, but this might be a bit much.

Photobucket

I also got Simplicity 4489, for $8. 

Photobucket

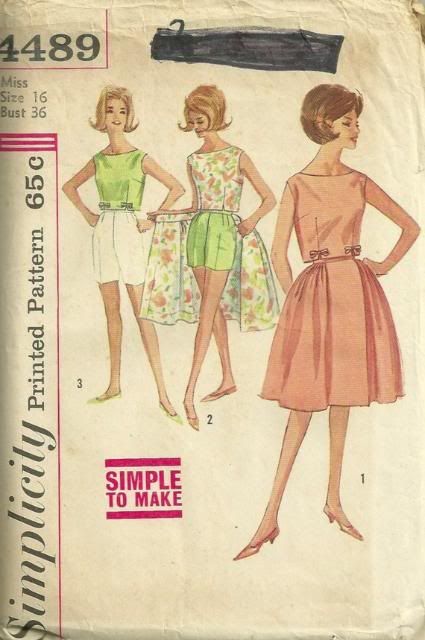
I love every piece, and I love the idea of coordinating separates. I could wear the skirt and top over my swimsuit and easily go from beach to dinner!  I want to make all the pieces of View 2, so I have to start looking for fabric. 

The swimsuit pattern came yesterday and I immediately abandoned my crinkle silk dress and started working on it.  The dress is close to being finished, I just need to attach the bodice to the skirt, do the zipper, and hem it.  Since I don't really have anywhere to wear it right now, it's okay if I finish it later.  I was just making it for fun.

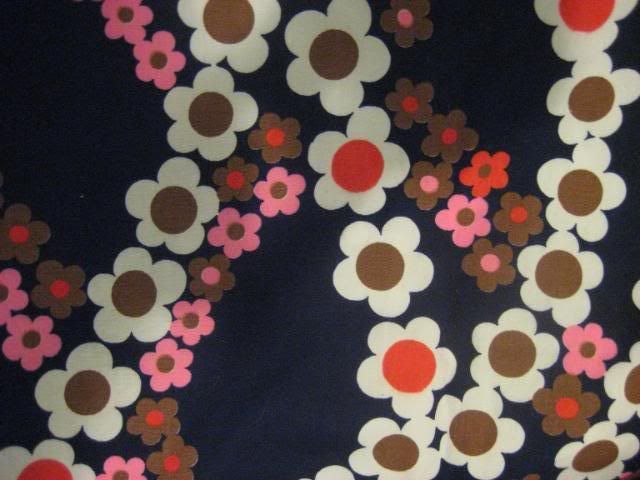
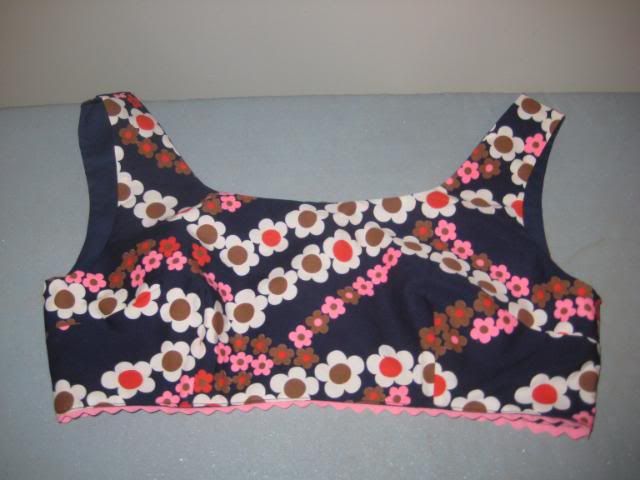
I definitely wanted to make the swim suit out of the blue 70's flowered fabric above.  I bought it in 2001 or so at an antique store in Minocqua and have been hanging on to it ever since.  Since I only had a yard, I did a test run first.  Instead of making a muslin, I used decent fabric so I could wear it if it turned out.  A wearable muslin, if you will.

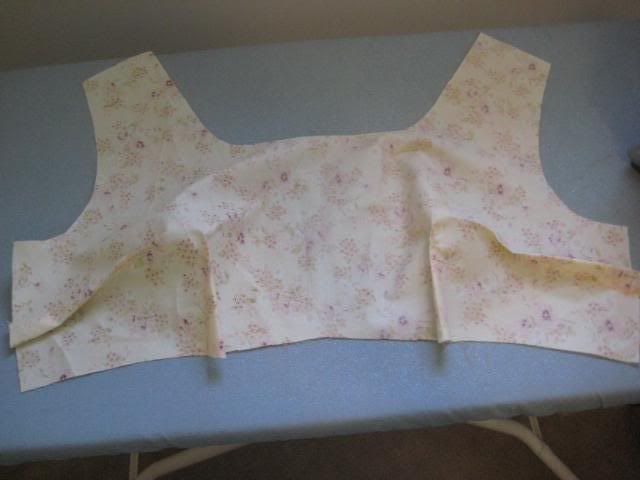
I got my pieces cut out:

Photobucket

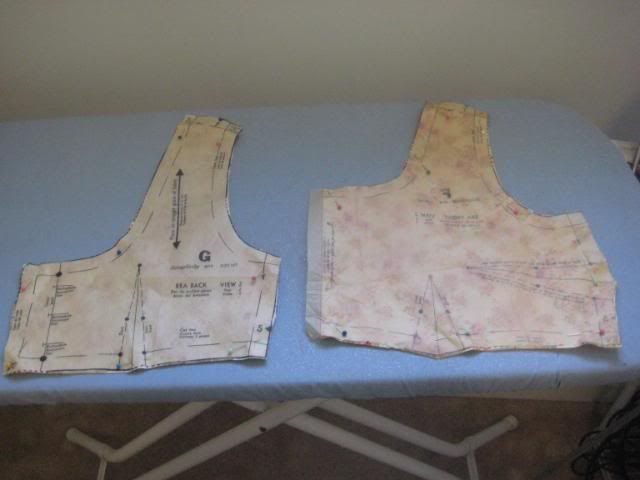
The top had two darts in the back and four in the front:

Photobucket

And the outside:

Photobucket

I sewed the sides together, leaving the straps loose.

Photobucket

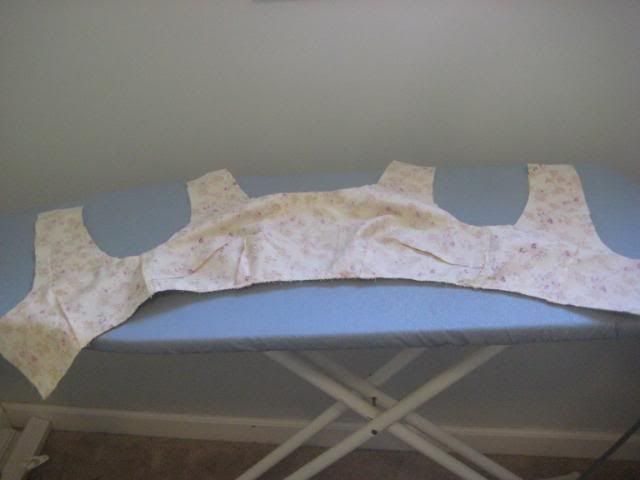
I sewed in my lining fabric, trimmed my seams, turned it inside out, and pressed. At this point, I'd only spent an hour or so on it and it was almost completely done.

Photobucket

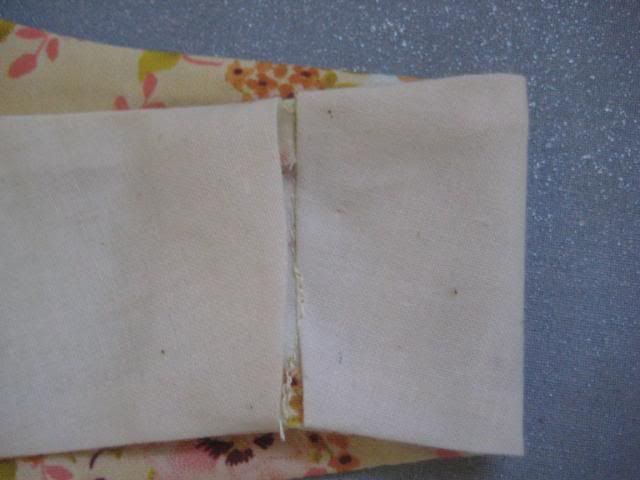
For the straps, you folded over the lining 5/8" but left the outer fabric raw.

Photobucket

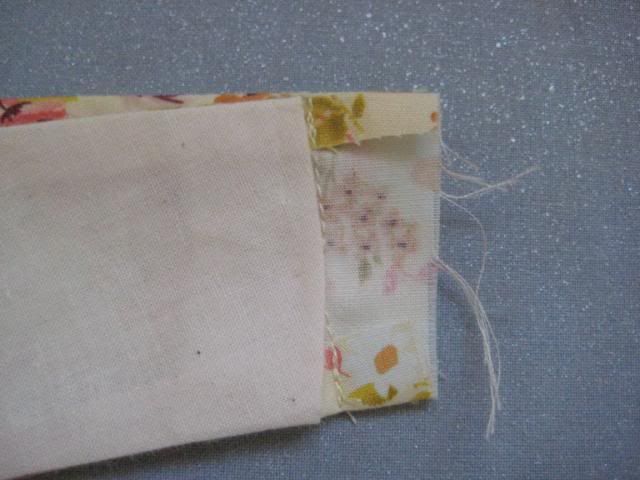
Then you sewed the two raw edges together, and tucked the seam under the folded lining edge.

Photobucket

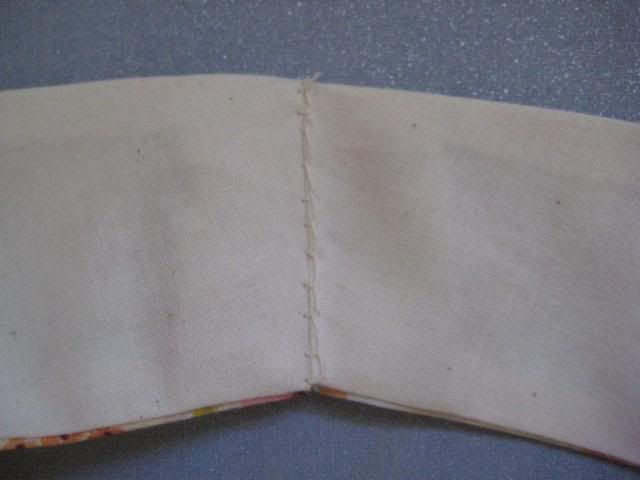
A little handsewing and it's all finished.

Photobucket

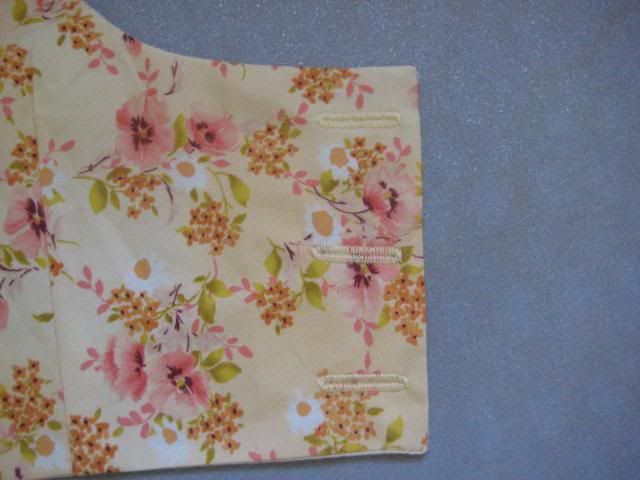
The swim suit had three buttons as a closure, but I'd never made a buttonhole before.  I played around with my buttonhole attachment, and I think they turned out great!  I was really excited about them.
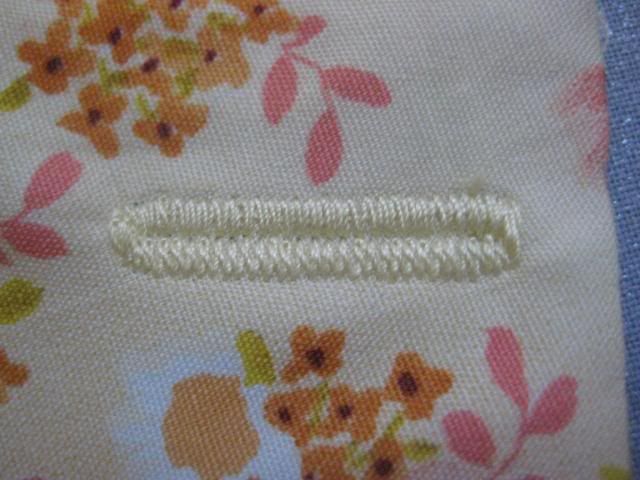
Photobucket

Buttonhole!

Photobucket

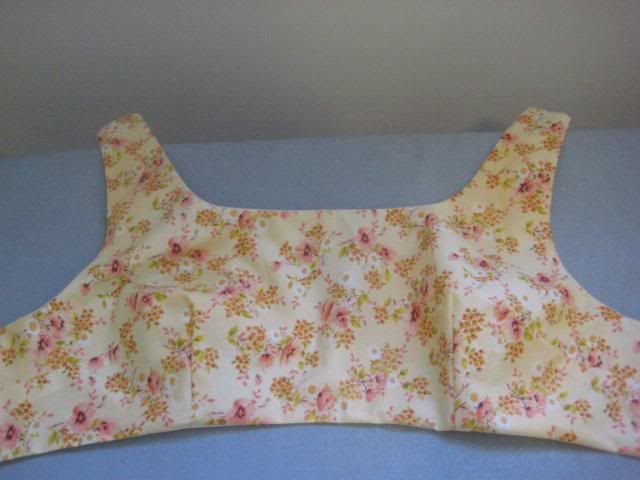
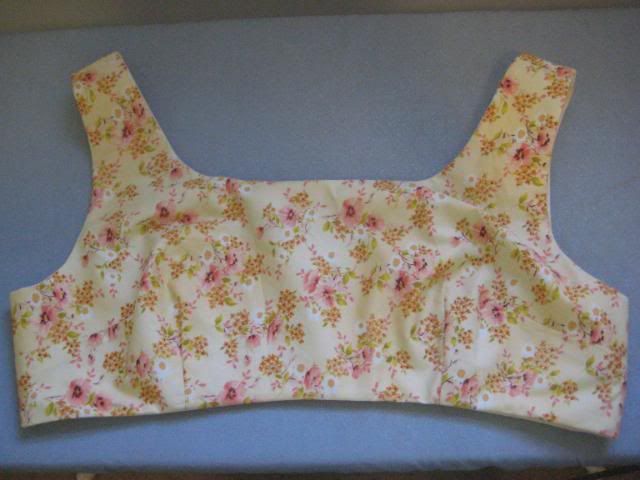
And here's the finished back:
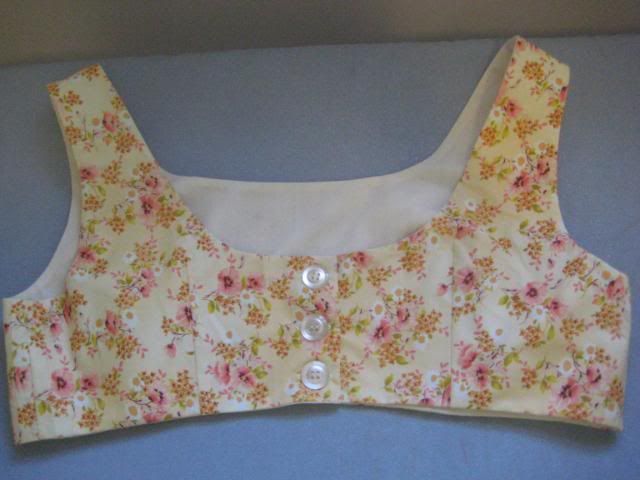
Photobucket

And front:

Photobucket

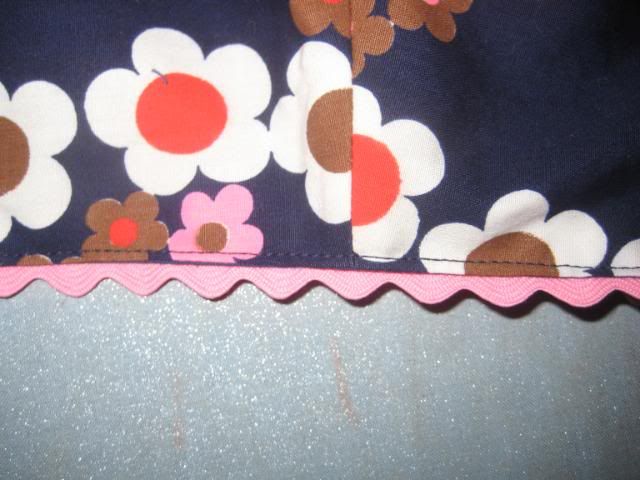
Later on, I decided to add some silly rickrack trim. The pattern has it and I was going to leave it off, but I like how it turned out.

Photobucket

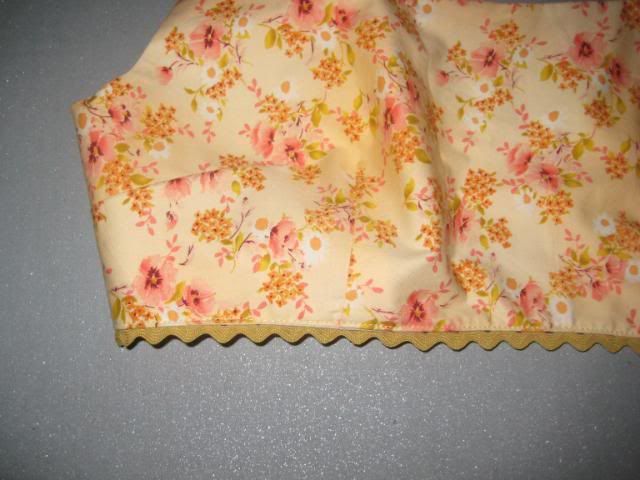
It fits really well, but I wish it was a tiny bit longer. I ended up making a second top while it was fresh in my mind, and I lengthened it an inch. Here's the floral version.

Photobucket

Photobucket

Next up, the matching shorts! I also bought some pink cotton to make a wrap skirt that will go with both tops.

Thursday, January 20, 2011

Crinkle Silk Dress, Part Deux

Last night, I got the bodice done on my 60's pattern I'm making in blue crinkle silk chiffon.  I finished underlining my fabric, and I switched to a zigzag stitch instead of a straight stitch halfway through.  I was having a lot of trouble with the fabric bunching up, and that seemed to help.  This is what my edges look like:

Photobucket

I did the back darts.  There's a large one on the bottom and a tiny one on the top.  They turned out great.  In this picture, you can see how badly my fabric was behaving when I tried to underline it.  It's fine and buried in the seam allowance, but it looks terrible here.

Photobucket

For the side front pieces, instead of sewing a princess seam, you turn the edge over 5/8" and topstitch.  The outside looked like this before I sewed it on:

Photobucket

And the inside where I clipped the curve.

Photobucket

I pinned it into place with a ton of pins, and carefully sewed it together.

Photobucket

My topstitching looks okay! Not great, but I'll take it.

Photobucket

I sewed the front to the back, and it's finally starting to resemble something.

Photobucket

I sewed in my lining.

Photobucket

And used my newfound knowledge of my machine's different stitches to overedge finish the seams.

Photobucket

Here's the finished bodice from the outside:

Photobucket

And the inside:

Photobucket

Really, for all the finicky work this dress required, it pretty much looks exactly like the bodice of New Look 6723. Kind of disappointing, if you ask me.  I can put together that entire dress in two hours, but so far I've spent at least five on this bodice alone.  I'm hoping the skirt with the big inverted pleat will help set it apart from everything else I've made.

I've got to go clean my spare bedroom for some guests who are coming this weekend, so no sewing tonight.  I do have some exciting news and patterns to go along with it, though.  I hope to have an update this weekend!

Followers